Showing posts with label freehand. Show all posts

Friday, March 1, 2013

Monarch Butterfly Wing Nails

Hello everyone :) I finally got to doing a manicure that I've been wanting to try for ages and I finally got to it! I found an awesome tutorial on youtube that shows you how to do it and it's fairly easy if you have a steady hand and you're in a quiet area.

I browsed Google Images and Pinterest for ideas on wing color ideas and I figured I should just go with orange for my first time and maybe do something more funky next time I do this manicure.

For the wing color, I used Bare If You Dare by China Glaze which is an awesome shimmery peachy color. I reviewed it here in the past if you want to check it out. I wanted to make it more interesting so I topped it off with Twisted by Fingerpaints which is my favorite multicolored flaky topcoat. For the black, I used the Kiss Nail Art striper in black obviously and the white is Alpine Snow by OPI and I used a dotting tool to apply the dots.

Now... onto the photos! :)
Here's another pic so you can see the flakes!
And of course I have to include a photo of the inspiration for this look!
I hope you liked it! It took me quite a while to finish the entire thing... maybe 2 hours at the most? If you have the patience and free time for this look, you should go for it! It looks very nice and eyecatching in person!

Monday, February 25, 2013

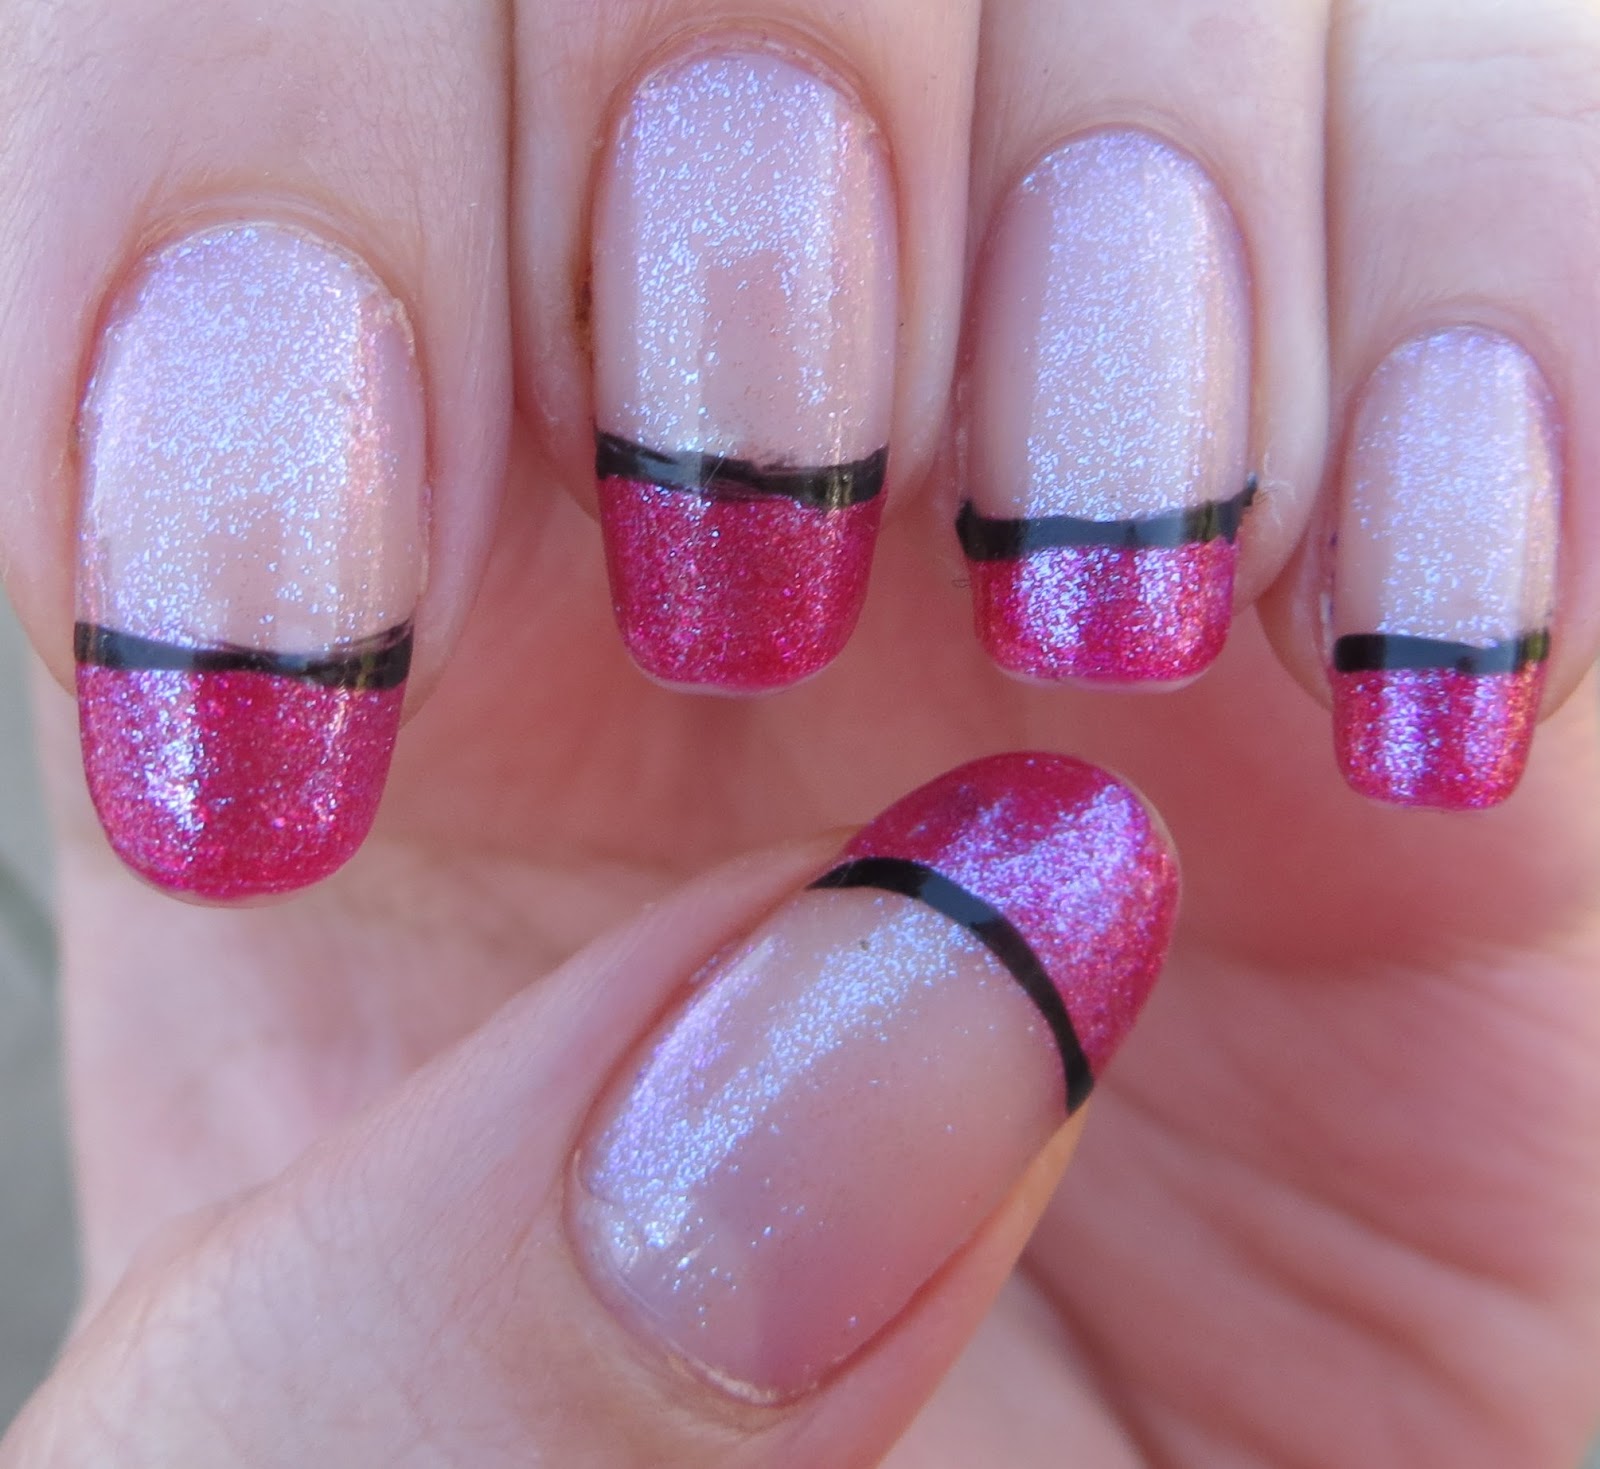
Hot Pink and Black French Tips

Hey everyone :) I wanted to show you the manicure I've been wearing for the past few days. I usually don't do French tips with my natural nail color showing but I have the perfect topcoat for it!

I used those French manicure nail strip guide things and painted two coats of Zoya's Gilda since it's a little bit sheer. Then, I did one coat of CND's Sapphire Sparkle which is a really nice blue/pink shimmer topcoat. The striping part seems difficult to some but it's actually very easy. I used Kiss Nail Art in black and dragged it across the edge of the pink. If I didn't reach the other side of my nail, I just started from the other side and connected the two lines.

I hope you like this look! It was very easy and didn't take much time at all. I also got a lot of nice compliments on it =P
Direct Sunlight
Indoors
Indoors w/ Flash

Sunday, January 13, 2013

First Attempt on Galaxy Nail Art

Hello everyone! I finally decided to give it a go and tried a nail art design that looked like a galaxy in outer space. I used a tutorial by MissJenFABULOUS from PolishAndPearls and used this tutorial she posted on youtube.

It was actually very fun and easy to do! It consisted of sponging on colors over black and putting a couple types of glitter topcoat over it. Before I did the design on myself, I picked out some colors I liked from myself and tested it over the black to make sure it delivered the effect I was looking for. I noticed it's best to use opaque colors, either with a creme finish or with little to no shimmer.

Here's what I used:

Liquid Leather by China Glaze (black)
Splish Splash by China Glaze (shimmery blue)
Pelican Grey by China Glaze(light grey)
Pink Shock by Maybelline (pink with subtle blue shimmer)
Northern Lights (glitter topcoat)
Techno by China Glaze (chunky glitter)

Aaaaaaand this is what I ended up with!


I really loved how it turned out. It definitely looks best when the colors are applied in different parts of the nail. This would definitely look nice with some green and orange in it so I might be attempting that in the future. Also, after I get some practice, I think it would be awesome to throw some spiral galaxies on it as well. I tried that at first and it was an utter fail -___-

Have you tried doing galaxy nails before? I would love to see some of the designs you've tried or came up with :)

Wednesday, July 4, 2012

Happy 4th of July! Independence Day Manicure :)

Hello readers. Today I'm going to show you my nails for 4th of July and show you last year's 4th of July nails.

I used:

Blue = Eyes Like Sapphires by China Glaze
Red = Ruby Pumps by China Glaze
Silver = Kiss Nail Art striper
White = Kiss Nail Art striper
Glitter topcoat = Northern Lights
Seche Vite topcoat

Here's how I did it:

I started off with two coats of Ruby Pumps. Then I did the white stripes by laying the brush pretty flat against the nail and dragging it. I then carefully drawed on the silver stripes where I wanted the blue to start. Then I freehanded two coats of Eyes Like Sapphires to the edge of the silver. I touched up the silver once more to even out the lines and finished it all with Northern Lights and Seche Vite :)


Like it? Post the links to your July 4th nails as well! I would love to see them! Click here to see others' July 4th designs.

Monday, September 5, 2011

Plaid Nails :)

Hey everyone! This will be a short post showing the manis I did on my friends hands and my own hands! We went to the Scottish Highland Games in Pleasanton so we wore plaid and did our nails plaid!

I'm not going to post all the colors but if you want to know what something is, just let me know :) Also, if anyone is interested in a tutorial for this look, I will gladly post one!

Click on the pic for a full-size image!


My hand is on the left and my friends hand is on the right :)

Monday, July 4, 2011

Lazy 4th of July Manicure =P

Hey everyone! I hope you're all having a good 4th of July so far! I don't know exactly what I'm doing yet but all I know is BBQ and fireworks are in order!

Sooo for the past few days, I have been wearing a really nice manicure... 3 coats of OPI's hot pink matte and one coat of OPI's I Lily Love You. It is such a gorgeous color combo. I honestly could not get myself to take it off. For today, I wanted to do some stripes and more stars and fireworks on my nails and of course use red, white, and blue, but I couldn't get myself to take the pink off =P

I REALLY wanted to do some kind of 4h of July manicure so this morning, about 2 minutes after I opened my eyes, I got to work and started painting on firework designs. I used my silver nail art polish by Kiss Nail Artist Paint and the blue is Eyes Like Sapphires by China Glaze. The star sequins are Silver Star by Klean Color.


And just for kicks, here is what I was wearing for the past few days :)


Happy 4th everyone! Don't drink and drive! =P

Monday, June 27, 2011

SF Gay Pride Parade + Rainbow Leopard Print Mani + Random Mani

Hey everyone! Again, I apologize for the lack of posts so here is an awesome post to make up for it! This past Sunday, I went to the Gay Pride Parade in San Francisco, CA. It was my first time going and my friends and I had a blast! There were so many interesting things to see! People's choice of clothing (or lack of) was entertaining as well :P Soooo anyways, of course I had to do some kind of colorful mani! I decided to rainbow leopard print nails on top of white. I got inspiration from this post on Natalie's blog. I don't have the energy to name off all the colors since I used like 10 polishes so if you want to know what a color is, just ask. The brands I used were OPI, Sally Hansen, Zoya, China Glaze, and Color Club.


And here is how I did my makeup :) I used my Beauty UK palette and L'oreal H.I.P. eyeshadows for this look. Again, if you want to know specific colors, just ask! Not really "in your face" but still colorful :)


And here is what I wore! I did a white wifebeater, rainbow suspenders, a blue denim skirt, hot pink zebra head band, and hot pink sunglasses!


Oh and here's a picture of me failing miserably at hula hooping lol. I was so frustrated >___<


Soooo that was my first Gay Pride experience! That was definitely an awesome day that I will never forget!

In the title of this post, I mentioned a random mani..... so I'm going to show you what I did for my sister! The blue I used is Sexy In The City by China Glaze and the silver is the Kiss Nail Artist Paint & Stencil Kit which came with black, silver, and white. This was my first attempt at free-handing at nail art designs. This was pretty simple but I love how it turned out on her!

Related Posts Plugin for WordPress, Blogger...